Uni-Directional WIFI Range Extender
07/20/06
forward: It’s been almost 3 years since I originally posted this idea on my site as well as wrote the instructable and it made its way through the web, hitting a lot of famous sites pretty fast. I’ve recopied it here for a couple of reasons; I wanted to get some content on the new site as fast as possible and I also wanted to play around with how I will display content. This is not meant to replace my instrucatable and I invite you to take a look at it here. Thanks again for taking a look.
intro: Uni-Directional WIFI Range Extender
Easily receive WIFI signals from far away using a standard USB WIFI adaptor and a bit of ingenuity. This Simple idea requires no modifications to a USB WIFI adaptor or your computer. A simple way to increase the signal strength and range of your WIFI. Plus it works with all USB WIFI adaptors

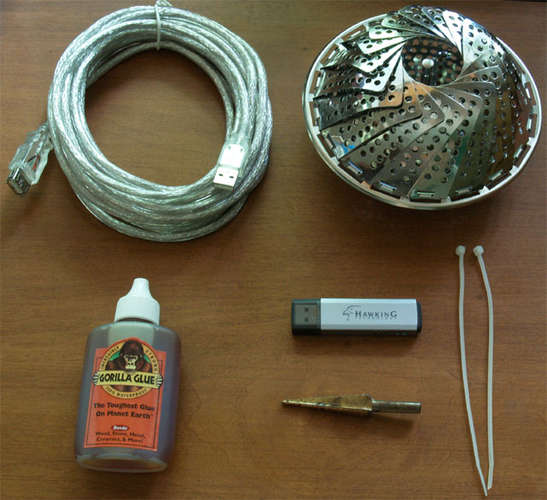
Step 1: Tools and Parts Needed
You need only a few parts for this project and they all are pretty cheap except for the USB WIFI adaptor. ( I got mine on sale for $10, just check the ads)
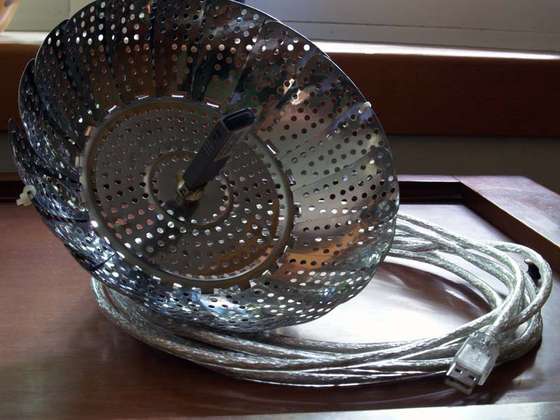
1 – Metal Strainer/Steamer
1 – USB WIFI Adaptor
1 – USB Extension Cable (I chose a 10ft long)
½” Drill Bit (I like to use stepper bits for metal)
Gorilla Glue (Epoxy works well too)
2 – Zip Ties
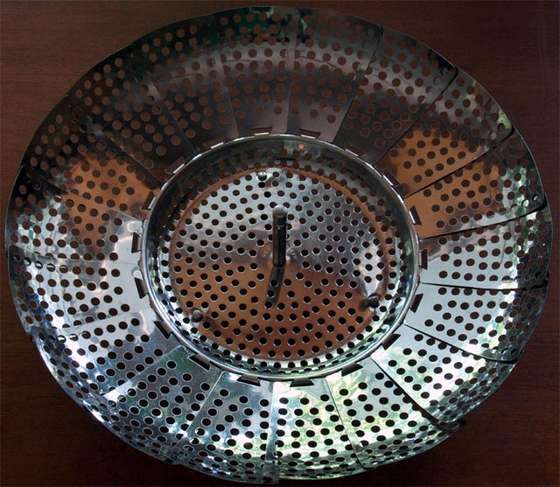
step 2: Drilling the Strainer/Steamer
Remove the Center Post (If your’s had one) and drill a 1/2″ hole as that is perfect size to fit the usb extention.
step 3: Glue and Zip-Ties
Insert the Female end of the USB extention (the part that doesnt connect to your computer) into the hole you just drilled.
Then just apply the glue/epoxy and let it sit for 24 hours. This Creates a strong bond between the plastic and metal. I used some tape to help hold the connecter in place while the glue cured.
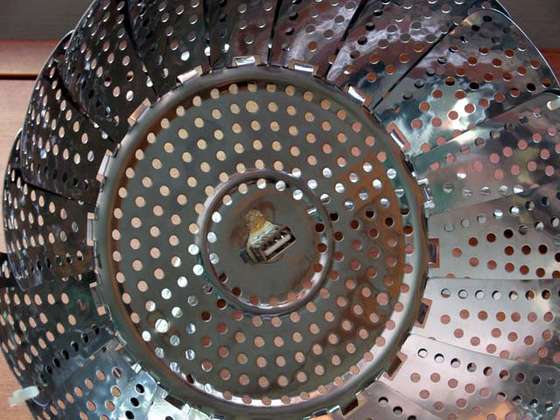
Be sure to apply glue to both sides of the connecter.
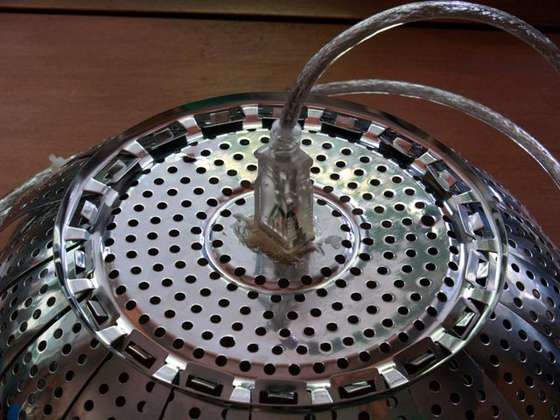
Once thats dry the next day, zip tie 2 of the metal “ears” so they wont fold in on themselves when you use it.

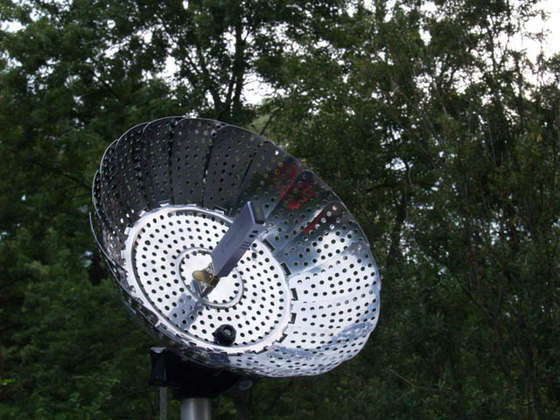
step 4: Finish
Just plug the USB WIFI adaptor into the socket on the dish and plug the other end into your computer. Enjoy boosted signal strength and improved distance. Fire up Netstumber or Kismet to really see the gain in power. This works even better than I thought it would. Be sure to leave your comments on how well it worked. Works great for war driving too.
step 5: Update: Tripod Mount
I decided to make the dish tripod mountable as its really hard to try and hold it to lock in a far away signal. The parts needed are pretty straight-forward.
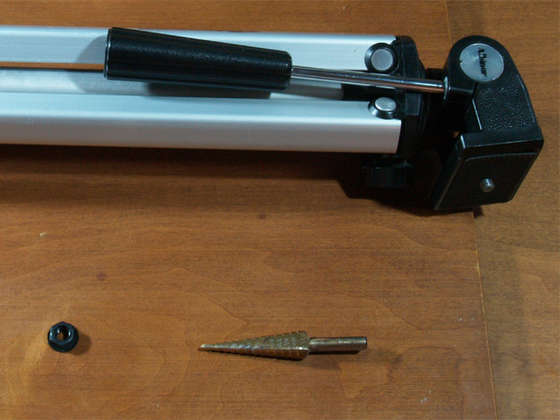
Tripod
Nut for the bolt on the tripod
9/32″ Drill Bit (Stepper bit works really nice for enlarging the hole)
Pick a hole near the edge of the dish and use the drill bit to enlarge it. I chose the one where one of the feet had once been secured. Then just put the bolt from the tripod trough the hole and secure with the nut. Works great.

1:20 pm on June 17th, 2009
Tom,
This is totally awesome! You posting it outside on your roof…wow!
Thanks for the link as well. Yours is up on my site…
3:21 pm on February 11th, 2010
Looks great and thank you for passing along the infos to build one of these.